Monday, November 26, 2012

Birthing a Pallet Table Prop ~ Part 1


I hope everyone has had a wonderful holiday. If you haven't noticed, I decided to take a little unscheduled blogging break to spend more time making stuff for the holiday rush and to spend more time with my family. 

Now that I'm back I thought I'd publish this again to refresh your brain and get you ready for part 2. The fun part in my opinion, painting and distressing it. So here it is. Look for part 2 next week!
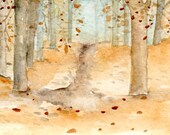
There she is in all her glory... and paint that dripped down the leg that I didn't notice until now LOL


Before I can tell you guys how I managed to get my table so fabuloso looking by distressing the wood – we’ve got to have a table to paint first!

At my day job we have a warehouse & with a warehouse comes piles of pallets. So I stole a few – 3 to be exact. Well not really “stole” I had permission of course. I picked them the same size (that’s pretty important). You have to have that many because the wood panels across the top of the pallet are spaced out quite a bit and to have a table that’s not totally full of holes you have to have them closer together also you will need to take the 4 sides off of the remaining pallet and use it as the legs.

So that’s step one - Choosing the 3 pallets. Then rip out all of the panels on all of them (be careful, it’s really easy to break them). The easiest way we found to take them out is to very carefully hammer from the opposite side on each end of the panel until they fall out. Then you have to remove all of the existing nails.


Step 2 – Take all of those panels you just smacked out of your pallets and put them right back on LOL. Not exactly where you found them of course, much closer together this time.

My hubby and I banging away at the table... FYI I'm terrible with a hammer


Step 3 – take the one of the remaining pallet frames and take the frame apart. The frame is generally a lot sturdier than the panels on top so you can use the frame’s 4 pieces as legs! Make sure all 4 pieces are the same length… or you’ll have one jacked & wobbly table. Then take the pieces and wedge one in each inside corner. I recommend attaching them with at least 2 long screws each. They seemed to hold better than the nails we used.

Whabam! Magic! You have a table… a free one might I add if you already have nails and a hammer. All natural, all free, all recycled, all good! I’ll show you how we painted the wood next!

Thursday, October 11, 2012

October’s Featured Etsian ~ Jamie Gillen of Paisley Maizie


I originally found Paisley Maizie (click) while curating one of my Treasury Tuesdays; this one was all about… surprise, Paisley patterns (click). I liked her story and her work so much I just HAD to have her as a feature! Ms. Jamie is a dedicated mom, nursing student, and a hell of a seamstress with a great sense of style and practicality! Here’s what she had to say in our interview!

This is Jamie! Say hello!!!
  What are you & your shop all about?
I started my shop because I had gone back to school for nursing and needed additional income and a creative outlet, I had NO idea it would get as big as it has.  My shop is my baby now and I honestly hope to keep it up far past graduation. 

·      How do you juggle both nursing school AND a store?
I have a very strict schedule about when I sew and when I study and I have to stick with it just to keep up.  I do give up a lot of personal fun time but it’s worth it!

How long have you been sewing?
I taught myself to sew about 4 weeks before my shop opened its “doors” LOL.  I bought myself a sewing machine for my birthday and taught myself via YouTube!  Luckily I picked it up super fast and LOVED it!
Reversable Chevron Camera Cover (click)


·      What has been your favorite experience as a seller?
Seeing where each of my items gets to travel.  I have shipped to every state including Hawaii and Alaska in addition to far off places like South Australia and Dubai, India.  It’s so interesting to think that things that I have made with my own hands are all over the world!

·      Most of your items are camera straps, are you a photographer?
I have a love and a passion for photography but I am not a professional photographer by any means.  I made a strap cover for myself because I hated wearing the leather one on my neck for more than 10 minutes and I was constantly losing my lens cap.  I showed it to a few friends and they all said I should sell them on Etsy so after making a few different ones for myself and feeling like I had come up with a great design I re-opened the shop and sold one the same day I opened!  When by one week I was getting several orders a day I knew I was onto something!!

Ruffled camera strap (click)


·      What would you say your style is?
Very modern and colorful, I like to have accents that pop.

·      Where did the name of your store come from?
Paisley is my favorite pattern to work with and it also happens to sound great with Maizie which is my daughter’s name.

·      What would you say is the most important/unique about your products?
My covers for both camera straps and stethoscopes are made for comfort and style.  I see a lot of other designs that aren’t padded enough or look very stiff and over padded.  I work on my designs from both angles so that it’s a great combination of comfort and style added to your item.

Padded Stethoscope Cover (click)


·      Do you have any new/exciting things coming in the near future you want to share?
I am adding new items to the shop constantly and I run coupons and giveaways from my Facebook page as often as I can!

·      Do you have any pets?
I am a HUGE animal lover and I currently have 4 cats, 2 small dogs and my daughter has a few fish!  I actually recently donated an item to an organization who helps homeless cats and was having a dinner with a silent auction. 

You can find this bangin’ awesome store:
Facebook(click) – hey the girl runs SALES here

Take a peek into Jamie's office! Here's her sewing space.

This is where all those gorgeous fabrics are cut!


Tuesday, October 9, 2012

Treasury Tuesday ~ Fall for Watercolors


Ok so maybe it’s not technically fall but here in Alabama, things are finally starting to cool off. It’s FINALLY starting to feel like fall in the south!

I am a sucker for watercolors. It’s my favorite medium next to acrylic… although I suck at both (I’ll stick to the knitting) I love they way it looks. Here’s some amazing watercolor art for the southern fall (everyone else’s winter).


'Fall for Watercolors' by Innov8iveKnits


Paris in fall - watercolor -...
$32.00

Autumn Landscape Print Fall ...
$49.00

Custom Fall Watercolor Paint...
$39.99

Cupcake Art, Fall Watercolor...
$15.00

Autumn Tree Print- Realistic...
$20.00

Fall Leaves Painting, Origin...
$40.00

Fall lake, watercolor landsc...
$39.00

Fall - original painting - a...
$22.00

Fall Leaf Leaves Greeting or...
$10.00

Path through autumn trees. F...
$25.00

FALL SALE Brown tree silhoue...
$55.00

Watercolor Giclee Print - Th...
$75.00

Fall Autumn ORIGINAL WATERCO...
$50.00

5x7 Original Watercolor Lan...
$48.00

Dreamed fall - ACEO Autumnal...
$10.00

watercolor river and tree st...
$75.00
Designed with love by BDD